m (ToU) |
m (clean up) |
||
| (29 intermediate revisions by 10 users not shown) | |||
| Line 1: | Line 1: | ||
| ⚫ | There are several useful files in the {{Code Font|Code = \The Witcher 2\CookedPC}} folder such as "{{Code Font|Code = en0.w2strings, fr0.w2strings, zh0.w2strings, de0.w2strings}}..." these files contain all of the text, journal, dialogue, quest, character, attribute, skill entries. The first 2 letters of the filenames indicate the language version. |
||
| − | {{stub}} |
||
| ⚫ | To extract the information, first off use [http://www.nexusmods.com/witcher2/mods/768/? Gibbed Red Tools] to decode them then view/edit them with a {{Code Font|Code = .xml}} editor such as [http://notepad-plus-plus.org/ Notepad++]. It's easy, but the file structure is a little different than a simple {{Code Font|Code = .xml}} file. |
||
| ⚫ | There are several useful files in the |
||
| ⚫ | |||
| ⚫ | To extract the information, first off use |
||
| − | |||
| ⚫ | |||
== Step by step guide == |
== Step by step guide == |
||
| − | + | Written by [[User:JPulowski|JPulowski]] |
|
| + | |||
First off let's take a look at basic file types: |
First off let's take a look at basic file types: |
||
| − | {| |
+ | {| class="sortable listing" width="100%" |
| − | ! |
+ | ! width="25%" | Extension |
| − | ! class="unsortable" | |
+ | ! class="unsortable" width="45%" | Type |
| − | ! class="unsortable" | |
+ | ! class="unsortable" width="30%" | Contains |
|- |
|- |
||
| + | | |
||
| − | | '''<code>*.w2strings</code>''' |
||
| + | .w2strings |
||
| − | | [[The Witcher 2: Assassins of Kings]] string file |
||
| + | | {{Tw2}} string file |
||
| Text |
| Text |
||
|- |
|- |
||
| + | | |
||
| − | | '''<code>*.w2ent</code>''' |
||
| + | .w2ent |
||
| − | | [[The Witcher 2: Assassins of Kings]] entity file |
||
| + | | {{Tw2}} entity file |
||
| Models, miscellaneous... |
| Models, miscellaneous... |
||
|- |
|- |
||
| + | | |
||
| − | | '''<code>*.dds</code>''' |
||
| + | .dds |
||
| DirectDraw Surface |
| DirectDraw Surface |
||
| Textures, images |
| Textures, images |
||
|- |
|- |
||
| + | | |
||
| − | | '''<code>*.dzip</code>''' |
||
| + | .dzip |
||
| − | | [[The Witcher 2: Assassins of Kings]] archive file |
||
| + | | {{Tw2}} archive file |
||
| Game files |
| Game files |
||
|- |
|- |
||
| + | | |
||
| − | | '''<code>*.xbm</code>''' |
||
| + | .xbm |
||
| X BitMap graphic file |
| X BitMap graphic file |
||
| Textures, images |
| Textures, images |
||
|- |
|- |
||
| + | | |
||
| − | | '''<code>*.xml</code>''' |
||
| + | .xml |
||
| Extensible markup language |
| Extensible markup language |
||
| Item and character attributes, miscellaneous... |
| Item and character attributes, miscellaneous... |
||
|- |
|- |
||
| + | | |
||
| − | | '''<code>*.swf</code>''' |
||
| + | .swf |
||
| Shockwave Flash Object |
| Shockwave Flash Object |
||
| Images, HUD, animations... |
| Images, HUD, animations... |
||
|- |
|- |
||
| + | | |
||
| − | | '''<code>*.usm</code>''' |
||
| + | .usm |
||
| Scaleform GFX Player file |
| Scaleform GFX Player file |
||
| Video |
| Video |
||
| + | |- |
||
| + | | |
||
| + | .ws |
||
| + | | {{Tw2}} script |
||
| + | | Game machanics, behaviors, etc... |
||
|} |
|} |
||
=== Requirements === |
=== Requirements === |
||
| − | *[http://www. |
+ | *[http://www.nexusmods.com/witcher2/mods/768/? Gibbed Red Tools] |
*Text editor (Notepad, [http://notepad-plus-plus.org/ Notepad++]) |
*Text editor (Notepad, [http://notepad-plus-plus.org/ Notepad++]) |
||
*Image editor ([http://www.gimp.org/ GIMP], [http://www.adobe.com/products/photoshop.html Adobe Photoshop]) |
*Image editor ([http://www.gimp.org/ GIMP], [http://www.adobe.com/products/photoshop.html Adobe Photoshop]) |
||
| Line 59: | Line 71: | ||
=== Unpacking .dzip files === |
=== Unpacking .dzip files === |
||
| − | In order to unpack .dzip files, first off all make sure you've downloaded [http://www. |
+ | In order to unpack .dzip files, first off all make sure you've downloaded [http://www.nexusmods.com/witcher2/mods/768/? Gibbed Red tools]. In this tutorial, we are going to unpack pack0.dzip file which contains all of the game files in itself. |
| − | *Open up '''Command Prompt'''. (Start › Run... › Open: |
+ | *Open up '''Command Prompt'''. (Start › Run... › Open: cmd › '''OK''' / '''⊞ Win''' + '''R''' › Open: cmd › '''OK''') |
| − | *Locate |
+ | *Locate {{Code Font|Code = Gibbed.RED.Unpack.exe}} which is usually located in {{Code Font|Code = C:\Program Files\Gibbed's RED Tools (32-bit) or C:\Program Files (x86)\Gibbed's RED Tools (64-bit)}}. |
| + | *Drag {{Code Font|Code = Gibbed.RED.Unpack.exe}} to '''Command Prompt''' or write |
||
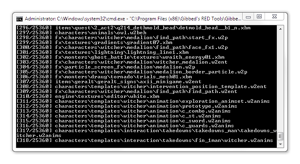
| − | *Drag '''<code>Gibbed.RED.Unpack.exe</code>''' to '''Command Prompt''' or write <code>"C:\Program Files\Gibbed's RED Tools\Gibbed.RED.Unpack.exe"</code> (32-bit) / <code>"C:\Program Files (x86)\Gibbed's RED Tools\Gibbed.RED.Unpack.exe"</code> (64-bit) to '''Command Prompt'''.<br />You should see something like this on Command Prompt:<br />[[File:Tw2_guide_cmd01.png|300px]] |
||
| + | **For 32-bit: {{Code Font|Code = "C:\Program Files\Gibbed's RED Tools\Gibbed.RED.Unpack.exe"}} |
||
| + | **For 64-bit: {{Code Font|Code = "C:\Program Files (x86)\Gibbed's RED Tools\Gibbed.RED.Unpack.exe"}} |
||
| + | *to '''Command Prompt'''.<br>You should see something like this on Command Prompt:<br>[[File:Tw2_guide_cmd01.png|300px]] |
||
*If you hit '''ENTER''', you'll see options: |
*If you hit '''ENTER''', you'll see options: |
||
| + | |||
<pre>Usage: Gibbed.RED.Unpack.exe [OPTIONS]+ input_dzip [output_dir] |
<pre>Usage: Gibbed.RED.Unpack.exe [OPTIONS]+ input_dzip [output_dir] |
||
Options: |
Options: |
||
| − | + | -o, --overwrite overwrite existing files |
|
| − | + | --cdkey=VALUE cdkey for use with DLC archives |
|
| − | + | (in format #####-#####-#####-#####) |
|
| − | + | -e, --extension=VALUE only extract files of this extension |
|
| − | + | -h, --help show this message and exit</pre> |
|
| + | |||
| − | *Locate |
+ | *Locate {{Code Font|Code = pack0.dzip}} which is located in {{Code Font|Code = /CookedPC}} folder in The Witcher 2 game directory. |
| − | *Drag |
+ | *Drag {{Code Font|Code = pack0.dzip}} to '''Command Prompt''' but make sure there is a space between two directories or you'll get an error message. For instance: |
:'''WRONG:''' |
:'''WRONG:''' |
||
:<pre>"C:\Program Files (x86)\Gibbed's RED Tools\Gibbed.RED.Unpack.exe""C:\Games\GOG.com\The Witcher 2\CookedPC\pack0.dzip"</pre> |
:<pre>"C:\Program Files (x86)\Gibbed's RED Tools\Gibbed.RED.Unpack.exe""C:\Games\GOG.com\The Witcher 2\CookedPC\pack0.dzip"</pre> |
||
| − | :''' |
+ | :'''RIGHT:''' |
:<pre>"C:\Program Files (x86)\Gibbed's RED Tools\Gibbed.RED.Unpack.exe" "C:\Games\GOG.com\The Witcher 2\CookedPC\pack0.dzip"</pre> |
:<pre>"C:\Program Files (x86)\Gibbed's RED Tools\Gibbed.RED.Unpack.exe" "C:\Games\GOG.com\The Witcher 2\CookedPC\pack0.dzip"</pre> |
||
| − | *Locate your output directory which must be located outside of the game directory or you may have some issues when playing the game. For instance I've created a folder named |
+ | *Locate your output directory which must be located outside of the game directory or you may have some issues when playing the game. For instance I've created a folder named {{Code Font|Code = /Witcher2Output}} outside of the game directory. Create a new folder, name it as you wish. Then drag the folder to '''Command Prompt'''. And make sure there are spaces between three directories. So the final result must be something like this: |
| − | :<pre>"C:\Program Files (x86)\Gibbed's RED Tools\Gibbed.RED.Unpack.exe" "C:\Games\GOG.com\The Witcher 2\CookedPC\pack0.dzip" "F:\Witcher2Output"</pre><br |
+ | :<pre>"C:\Program Files (x86)\Gibbed's RED Tools\Gibbed.RED.Unpack.exe" "C:\Games\GOG.com\The Witcher 2\CookedPC\pack0.dzip" "F:\Witcher2Output"</pre><br>[[File:Tw2_guide_cmd02.png|300px]] |
| − | *Hit '''ENTER''' and wait until all of the files has been extracted it may take several minutes depending on your computer and numbers of the files that it is getting extracted.<br |
+ | *Hit '''ENTER''' and wait until all of the files has been extracted it may take several minutes depending on your computer and numbers of the files that it is getting extracted.<br>[[File:Tw2_guide_cmd03.png|300px]] |
| − | *After all of the files has been extracted, you may close '''Command Prompt'''.<br |
+ | *After all of the files has been extracted, you may close '''Command Prompt'''.<br>[[File:Tw2_guide_cmd04.png|300px]] |
| − | *Now if you open up your output directory, you may see all of the files that has been extracted from |
+ | *Now if you open up your output directory, you may see all of the files that has been extracted from {{Code Font|Code = pack0.dzip}}.<br>[[File:Tw2_guide_w2output.png|300px]] |
=== Editing/Viewing texture files === |
=== Editing/Viewing texture files === |
||
There are two types of textures: |
There are two types of textures: |
||
| − | + | *.dds — DirectDraw Surface |
|
| − | + | *.xbm — X BitMap graphic file |
|
| − | '''DirectDraw Surface''' files usually contain 2D textures such as icons but also some of them contained in |
+ | '''DirectDraw Surface''' files usually contain 2D textures such as icons but also some of them contained in *.xbm files, the ones that contained *.xbm files contains model textures |
| − | '''X BitMap graphic file'''s contain model |
+ | '''X BitMap graphic file'''s contain model *.dds texture files and *.bin files which is needed to convert back *.dds files to *.xbm files. |
| − | Let's start with simple |
+ | Let's start with simple *.dds files. For viewing purposes only you may use [http://developer.nvidia.com/sites/default/files/akamai/tools/files/Windows_Texture_Viewer_v089b.rar Windows Texture Viewer]. It's a simple program designed for viewing DirectDraw Surface files. After downloading the *.rar file, extract its contents to any folder you wish. For making things easier, you may associate *.dds files with Windows Texture Viewer. |
| − | You may find |
+ | You may find *.dds files at these locations: |
| + | *{{Code Font|Code = ...\<Output Directory>\globals\gui\icons\}} |
||
| + | *{{Code Font|Code = ...\<Output Directory>\globals\gui\maps\}} |
||
| + | *{{Code Font|Code = ...\<Output Directory>\globals\gui\dreams\}} |
||
| − | Now let's try to open a |
+ | Now let's try to open a *.dds file with Windows Texture Viewer. Locate folder: ...{{Code Font|Code = \globals\gui\icons\journal\}} then try to open one of the texture files. I chose to open {{Code Font|Code = geralt_256x512.dds}} which is [[Geralt of Rivia|Geralt]]'s in-game journal image. If you've already associated *.dds files with Windows Texture Viewer then double click to any *.dds file. If you didn't associate them with Windows Texture Viewer then open up Windows Texture Viewer (WTV.exe) and drag one of the files to Windows Texture Viewer. Now you may see *.dds file. Pink areas show transparent areas in image. If you don't see any pink areas, press A to see alpha channel. |
[[File:Tw2_guide_wtv.png|300px]] |
[[File:Tw2_guide_wtv.png|300px]] |
||
| − | If you'd like to edit textures, you need to have an image editor such as [http://www.gimp.org/ GIMP] or [http://www.adobe.com/products/photoshop.html Adobe Photoshop] with DDS plugin. '' |
+ | If you'd like to edit textures, you need to have an image editor such as [http://www.gimp.org/ GIMP] or [http://www.adobe.com/products/photoshop.html Adobe Photoshop] with DDS plugin. ''(See [[#Requirements|requirements]] section.)'' |
=== Editing/Viewing .w2strings files === |
=== Editing/Viewing .w2strings files === |
||
| + | *.w2strings can be found in {{Code Font|Code = /CookedPC}} folder. |
||
| − | + | *.w2strings files contain all of the in-game text files such as journal entries, character names, item names, item descriptions etc. |
|
In order to view them, first they must be decoded using [http://www.witchernexus.com/downloads/file.php?id=52 Red Tools]. |
In order to view them, first they must be decoded using [http://www.witchernexus.com/downloads/file.php?id=52 Red Tools]. |
||
'''Languages:''' |
'''Languages:''' |
||
| − | {| |
+ | {| class="listing" width="25%" |
| − | |-style="background:none" |
||
| − | ! width=30 class="unsortable" | |
||
| − | ! class="unsortable" | |
||
|- |
|- |
||
| + | ! width="50%" | Name |
||
| ⚫ | |||
| + | ! width="50%" | Lang. |
||
| + | |- |
||
| ⚫ | |||
| Czech |
| Czech |
||
|- |
|- |
||
| − | | |
+ | | de0.w2strings |
| German |
| German |
||
|- |
|- |
||
| − | | |
+ | | en0.w2strings |
| English |
| English |
||
|- |
|- |
||
| − | | |
+ | | es0.w2strings |
| Spanish |
| Spanish |
||
|- |
|- |
||
| − | | |
+ | | fr0.w2strings |
| French |
| French |
||
|- |
|- |
||
| − | | |
+ | | hu0.w2strings |
| Hungarian |
| Hungarian |
||
|- |
|- |
||
| − | | |
+ | | it0.w2strings |
| Italian |
| Italian |
||
|- |
|- |
||
| − | | |
+ | | pl0.w2strings |
| Polish |
| Polish |
||
|- |
|- |
||
| − | | |
+ | | ru0.w2strings |
| Russian |
| Russian |
||
|- |
|- |
||
| − | | |
+ | | zh0.w2strings |
| Chinese |
| Chinese |
||
|} |
|} |
||
| + | |||
{{clear}} |
{{clear}} |
||
| − | In this tutorial, we are going to decode |
+ | In this tutorial, we are going to decode en0.w2strings file. |
| − | *Open up '''Command Prompt'''. (Start › Run... › Open: |
+ | *Open up '''Command Prompt'''. (Start › Run... › Open: cmd › '''OK''' / '''⊞ Win''' + '''R''' › Open: cmd › '''OK''') |
| − | *Locate |
+ | *Locate {{Code Font|Code = Gibbed.RED.Strings.exe}} which is usually located in |
| + | **for 32-bit: {{Code Font|Code = C:\Program Files\Gibbed's RED Tools}} |
||
| − | *Drag '''<code>Gibbed.RED.Strings.exe</code>''' to '''Command Prompt''' or write <code>"C:\Program Files\Gibbed's RED Tools\Gibbed.RED.Strings.exe"</code> (32-bit) / <code>"C:\Program Files (x86)\Gibbed's RED Tools\Gibbed.RED.Strings.exe"</code> (64-bit) to '''Command Prompt'''.<br />You should see something like this on Command Prompt:<br />[[File:Tw2_guide_cmd05.png|300px]] |
||
| + | **for 64-bit: {{Code Font|Code = C:\Program Files (x86)\Gibbed's RED Tools}} |
||
| + | *Drag {{Code Font|Code = Gibbed.RED.Strings.exe}} to '''Command Prompt''' or write |
||
| + | **for 32-bit: {{Code Font|Code = "C:\Program Files\Gibbed's RED Tools\Gibbed.RED.Strings.exe"}} |
||
| + | **for 64-bit: {{Code Font|Code = "C:\Program Files (x86)\Gibbed's RED Tools\Gibbed.RED.Strings.exe"}} |
||
| + | *to '''Command Prompt'''. You should see something like this on Command Prompt:<br>[[File:Tw2_guide_cmd05.png|300px]] |
||
*If you hit '''ENTER''', you'll see options: |
*If you hit '''ENTER''', you'll see options: |
||
| + | |||
<pre>Usage: Gibbed.RED.Strings.exe [OPTIONS]+ input [output] |
<pre>Usage: Gibbed.RED.Strings.exe [OPTIONS]+ input [output] |
||
Options: |
Options: |
||
| − | + | -d, --decode decode strings file |
|
| − | + | -e, --encode encode strings file |
|
| − | + | -h, --help show this message and exit</pre> |
|
| + | |||
| − | *Locate |
+ | *Locate {{Code Font|Code = en0.w2strings}} which is located in {{Code Font|Code = /CookedPC}} folder in The Witcher 2 game directory. |
| − | *Press '''SPACE''' and write <code>-d</code> then press '''SPACE''' again. |
||
| − | * |
+ | *Press '''SPACE''' and write -d then press '''SPACE''' again. |
| + | *Drag {{Code Font|Code = en0.w2strings}} to '''Command Prompt''' and press '''ENTER'''. |
||
| − | *If everything is gone perfectly, you will find a file named |
+ | *If everything is gone perfectly, you will find a file named {{Code Font|Code = en0.xml}} in {{Code Font|Code = /CookedPC}} folder which is located in your game directory. |
*Now you may open the file with your favorite text editor, in this tutorial we're going to use [http://notepad-plus-plus.org/ Notepad++]. |
*Now you may open the file with your favorite text editor, in this tutorial we're going to use [http://notepad-plus-plus.org/ Notepad++]. |
||
After you've opened the file, you will notice lots of texts. There are two types of text in strings files: |
After you've opened the file, you will notice lots of texts. There are two types of text in strings files: |
||
| − | : |
+ | :key — You may think it as an ID of the text. |
| − | : |
+ | :text — Description, text, entry etc. |
| + | |||
| ⚫ | |||
| ⚫ | |||
| ⚫ | |||
| − | + | <key id="geralt 0">99818</key></pre> |
|
| ⚫ | |||
We can use this method for any character in the game. Now, let's examine these lines. |
We can use this method for any character in the game. Now, let's examine these lines. |
||
| − | + | {{Code Font|Code = <key id="geralt">99817</key>}}, usually the first line is a key for the character's name. If we make another search using the keyword ''99817'', we'll find the line below: |
|
| − | <pre> <text id="99817">Geralt of Rivia</text></pre> |
||
| − | + | <pre> <text id="99817">Geralt of Rivia</text></pre> |
|
| + | |||
| + | So that means {{Code Font|Code = <key id="geralt">99817</key>}} corresponds to {{Code Font|Code = <text id="99817">'''Geralt of Rivia'''</text>}}. |
||
If we use the same method for second line, we'll find the line below which is the journal entry about Geralt of Rivia: |
If we use the same method for second line, we'll find the line below which is the journal entry about Geralt of Rivia: |
||
| + | |||
| − | <pre><text id="99818">Behold our hero: subjected to mutations and rigorous sword and sorcery training as a child, he has become a superhuman monster slayer. Always penniless and often disdained by those whom he protects, he wanders the world seeking work. Fate has little mercy for him, piling obstacles in his way, yet he trudges on. He has more scruples than a beggaring bum has fleas. Doubts haunt him even when a band of ruffians, knives drawn, approaches him on the highway. Is he a good man? I do not think so. Does he try to maintain his humanity? I believe he does.<br>You must know that Geralt of Rivia died once already, or at least everyone thought him dead. During a massacre in Rivia, he sought to defend non-humans and fell to overwhelming odds. Placed in a boat, he floated into the mist, into a realm where he finally found peace. Not for long. Because of forces to be mentioned later, Geralt returned just in time to defend the |
+ | <pre><text id="99818">Behold our hero: subjected to mutations and rigorous sword and sorcery training as a child, he has become a superhuman monster slayer. Always penniless and often disdained by those whom he protects, he wanders the world seeking work. Fate has little mercy for him, piling obstacles in his way, yet he trudges on. He has more scruples than a beggaring bum has fleas. Doubts haunt him even when a band of ruffians, knives drawn, approaches him on the highway. Is he a good man? I do not think so. Does he try to maintain his humanity? I believe he does.<br>You must know that Geralt of Rivia died once already, or at least everyone thought him dead. During a massacre in Rivia, he sought to defend non-humans and fell to overwhelming odds. Placed in a boat, he floated into the mist, into a realm where he finally found peace. Not for long. Because of forces to be mentioned later, Geralt returned just in time to defend the witchers' ancient home fortress, and then embarked on a mission to recover the secrets stolen from it. Along the way he took part in a Scoia'tael uprising, shattered a powerful criminal organization, and killed the Grand Master of the Order of the Flaming Rose. All the while his fame as a lover grew. Well, that's Geralt for you. As if all this wasn't enough, he then foiled the attempted assassination of King Foltest of Temeria and became one of the monarch's most trusted men.</text></pre> |
We may use this simple method to find in-game text. |
We may use this simple method to find in-game text. |
||
| Line 190: | Line 222: | ||
* [http://www.gog.com/en/forum/the_witcher_2/how_to_unpack_the_pack0_dzip_for_modders/post1 GOG.com forum thread about unpacking .dzip files] |
* [http://www.gog.com/en/forum/the_witcher_2/how_to_unpack_the_pack0_dzip_for_modders/post1 GOG.com forum thread about unpacking .dzip files] |
||
* [http://forum.xentax.com/viewtopic.php?f=10&t=6634 XeNTaX The Witcher 2 Game Archive Research forum thread] |
* [http://forum.xentax.com/viewtopic.php?f=10&t=6634 XeNTaX The Witcher 2 Game Archive Research forum thread] |
||
| + | * [http://jlouisb.users.sourceforge.net/ The Witcher 2/Redkit converter] |
||
| + | |||
[[Category:The Witcher 2]] |
[[Category:The Witcher 2]] |
||
| + | [[Category:Pages with tables]] |
||
Revision as of 01:19, 22 April 2019
There are several useful files in the folder such as "..." these files contain all of the text, journal, dialogue, quest, character, attribute, skill entries. The first 2 letters of the filenames indicate the language version.
To extract the information, first off use Gibbed Red Tools to decode them then view/edit them with a editor such as Notepad++. It's easy, but the file structure is a little different than a simple file.
For images, the extracted files are mostly in the folder, in format, so a program which can open this format and convert them to is useful. One such free program is GIMP.
Step by step guide
Written by JPulowski
First off let's take a look at basic file types:
| Extension | Type | Contains |
|---|---|---|
|
.w2strings |
The Witcher 2: Assassins of Kings string file | Text |
|
.w2ent |
The Witcher 2: Assassins of Kings entity file | Models, miscellaneous... |
|
.dds |
DirectDraw Surface | Textures, images |
|
.dzip |
The Witcher 2: Assassins of Kings archive file | Game files |
|
.xbm |
X BitMap graphic file | Textures, images |
|
.xml |
Extensible markup language | Item and character attributes, miscellaneous... |
|
.swf |
Shockwave Flash Object | Images, HUD, animations... |
|
.usm |
Scaleform GFX Player file | Video |
|
.ws |
The Witcher 2: Assassins of Kings script | Game machanics, behaviors, etc... |
Requirements
- Gibbed Red Tools
- Text editor (Notepad, Notepad++)
- Image editor (GIMP, Adobe Photoshop)
- Windows Texture Viewer
- QuickBMS
Unpacking .dzip files
In order to unpack .dzip files, first off all make sure you've downloaded Gibbed Red tools. In this tutorial, we are going to unpack pack0.dzip file which contains all of the game files in itself.
- Open up Command Prompt. (Start › Run... › Open: cmd › OK / ⊞ Win + R › Open: cmd › OK)
- Locate which is usually located in .
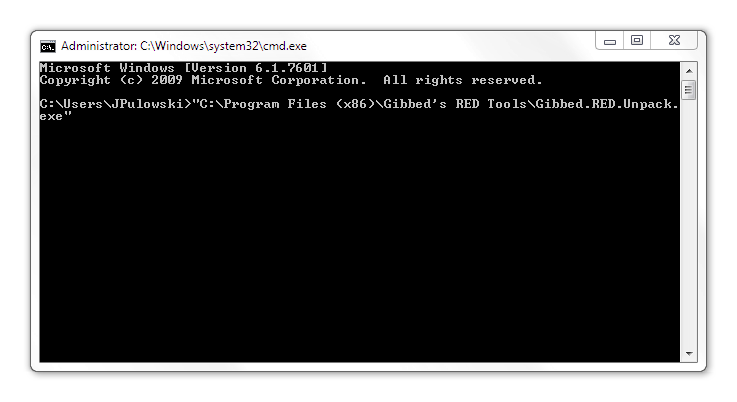
- Drag to Command Prompt or write
- For 32-bit:
- For 64-bit:
- to Command Prompt.
You should see something like this on Command Prompt: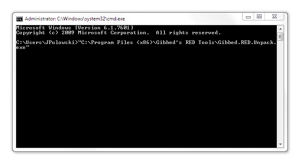
- If you hit ENTER, you'll see options:
Usage: Gibbed.RED.Unpack.exe [OPTIONS]+ input_dzip [output_dir]

Options:
 -o, --overwrite overwrite existing files
 --cdkey=VALUE cdkey for use with DLC archives
 (in format #####-#####-#####-#####)
 -e, --extension=VALUE only extract files of this extension
 -h, --help show this message and exit
- Locate which is located in folder in The Witcher 2 game directory.
- Drag to Command Prompt but make sure there is a space between two directories or you'll get an error message. For instance:
- WRONG:
"C:\Program Files (x86)\Gibbed's RED Tools\Gibbed.RED.Unpack.exe""C:\Games\GOG.com\The Witcher 2\CookedPC\pack0.dzip"
- RIGHT:
"C:\Program Files (x86)\Gibbed's RED Tools\Gibbed.RED.Unpack.exe" "C:\Games\GOG.com\The Witcher 2\CookedPC\pack0.dzip"
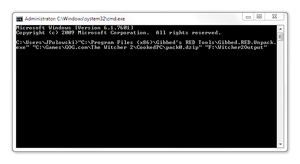
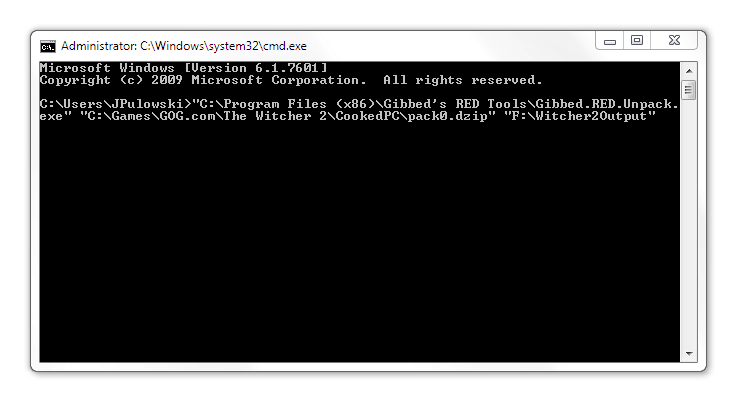
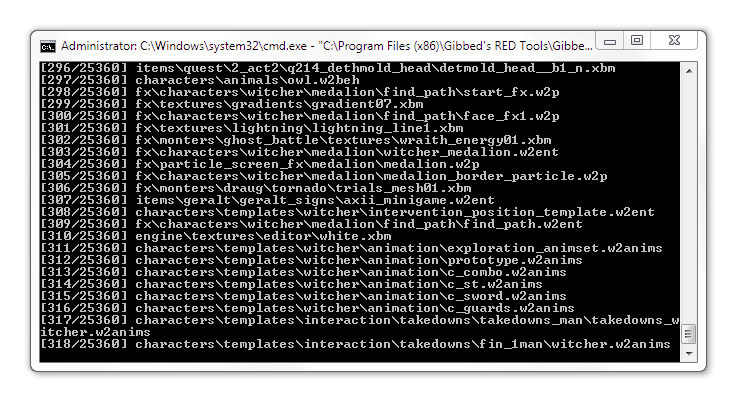
- Locate your output directory which must be located outside of the game directory or you may have some issues when playing the game. For instance I've created a folder named outside of the game directory. Create a new folder, name it as you wish. Then drag the folder to Command Prompt. And make sure there are spaces between three directories. So the final result must be something like this:
"C:\Program Files (x86)\Gibbed's RED Tools\Gibbed.RED.Unpack.exe" "C:\Games\GOG.com\The Witcher 2\CookedPC\pack0.dzip" "F:\Witcher2Output"
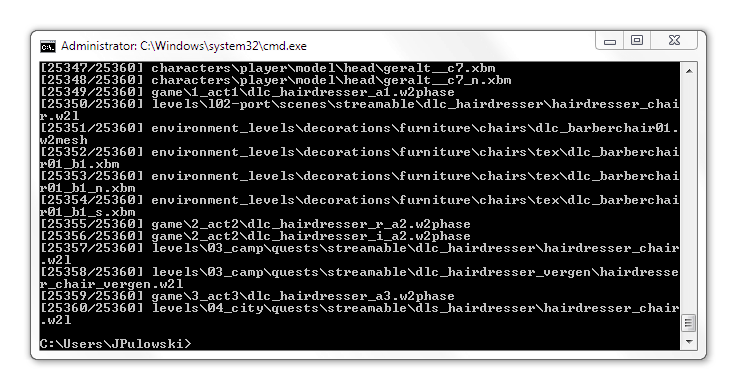
- Hit ENTER and wait until all of the files has been extracted it may take several minutes depending on your computer and numbers of the files that it is getting extracted.
- After all of the files has been extracted, you may close Command Prompt.

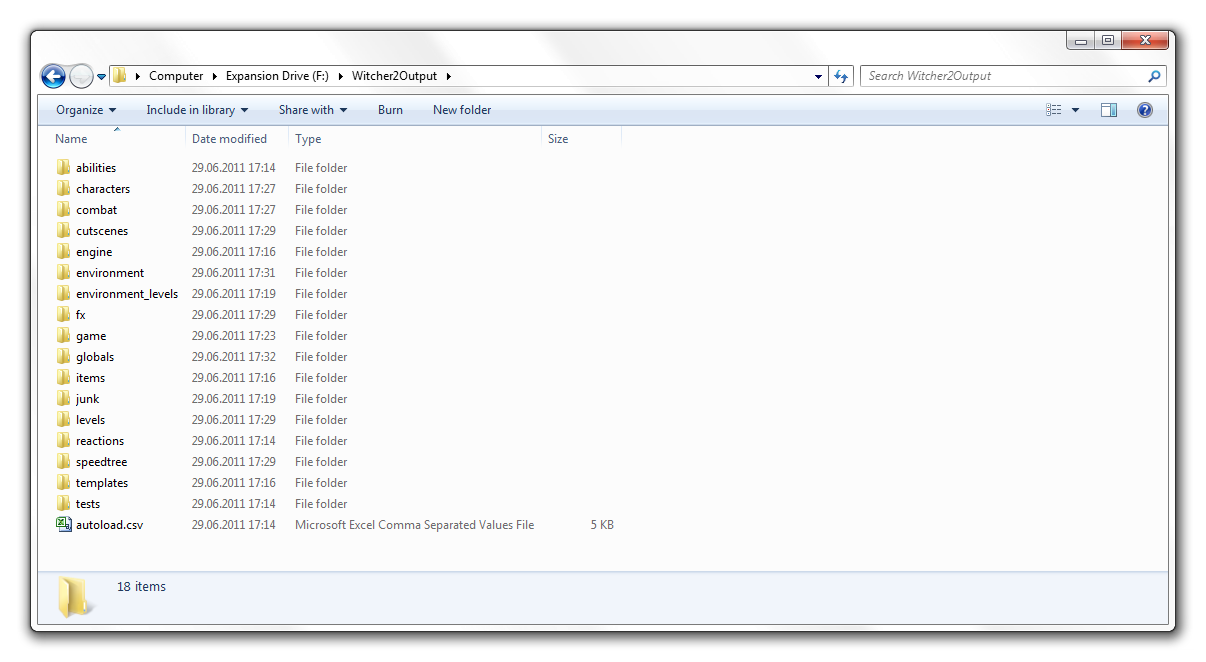
- Now if you open up your output directory, you may see all of the files that has been extracted from .
Editing/Viewing texture files
There are two types of textures:
- .dds — DirectDraw Surface
- .xbm — X BitMap graphic file
DirectDraw Surface files usually contain 2D textures such as icons but also some of them contained in *.xbm files, the ones that contained *.xbm files contains model textures
X BitMap graphic files contain model *.dds texture files and *.bin files which is needed to convert back *.dds files to *.xbm files.
Let's start with simple *.dds files. For viewing purposes only you may use Windows Texture Viewer. It's a simple program designed for viewing DirectDraw Surface files. After downloading the *.rar file, extract its contents to any folder you wish. For making things easier, you may associate *.dds files with Windows Texture Viewer.
You may find *.dds files at these locations:
Now let's try to open a *.dds file with Windows Texture Viewer. Locate folder: ... then try to open one of the texture files. I chose to open which is Geralt's in-game journal image. If you've already associated *.dds files with Windows Texture Viewer then double click to any *.dds file. If you didn't associate them with Windows Texture Viewer then open up Windows Texture Viewer (WTV.exe) and drag one of the files to Windows Texture Viewer. Now you may see *.dds file. Pink areas show transparent areas in image. If you don't see any pink areas, press A to see alpha channel.
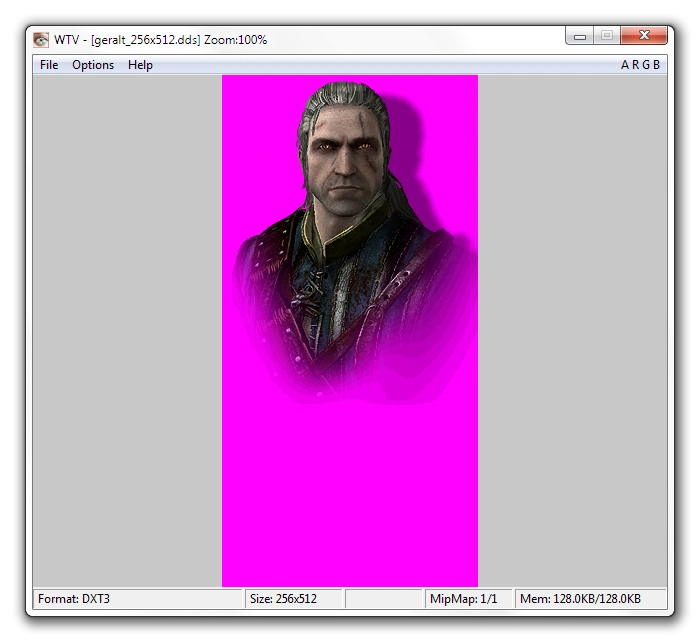
If you'd like to edit textures, you need to have an image editor such as GIMP or Adobe Photoshop with DDS plugin. (See requirements section.)
Editing/Viewing .w2strings files
- .w2strings can be found in folder.
- .w2strings files contain all of the in-game text files such as journal entries, character names, item names, item descriptions etc.
In order to view them, first they must be decoded using Red Tools.
Languages:
| Name | Lang. |
|---|---|
| cz0.w2strings | Czech |
| de0.w2strings | German |
| en0.w2strings | English |
| es0.w2strings | Spanish |
| fr0.w2strings | French |
| hu0.w2strings | Hungarian |
| it0.w2strings | Italian |
| pl0.w2strings | Polish |
| ru0.w2strings | Russian |
| zh0.w2strings | Chinese |
In this tutorial, we are going to decode en0.w2strings file.
- Open up Command Prompt. (Start › Run... › Open: cmd › OK / ⊞ Win + R › Open: cmd › OK)
- Locate which is usually located in
- for 32-bit:
- for 64-bit:
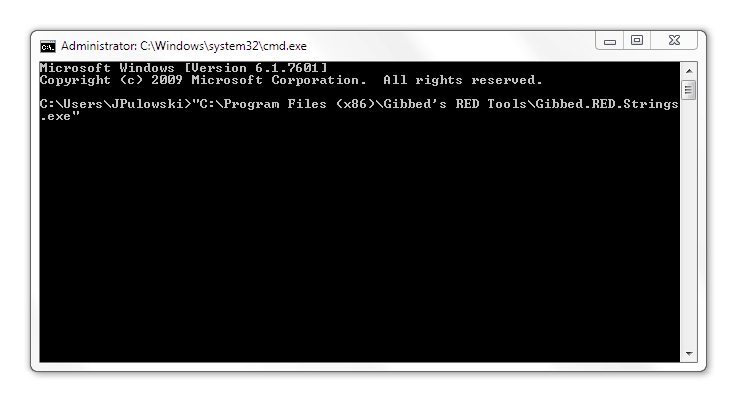
- Drag to Command Prompt or write
- for 32-bit:
- for 64-bit:
- to Command Prompt. You should see something like this on Command Prompt:
- If you hit ENTER, you'll see options:
Usage: Gibbed.RED.Strings.exe [OPTIONS]+ input [output]

Options:
 -d, --decode decode strings file
 -e, --encode encode strings file
 -h, --help show this message and exit
- Locate which is located in folder in The Witcher 2 game directory.
- Press SPACE and write -d then press SPACE again.
- Drag to Command Prompt and press ENTER.
- If everything is gone perfectly, you will find a file named in folder which is located in your game directory.
- Now you may open the file with your favorite text editor, in this tutorial we're going to use Notepad++.
After you've opened the file, you will notice lots of texts. There are two types of text in strings files:
- key — You may think it as an ID of the text.
- text — Description, text, entry etc.
For instance, I want to find Geralt's character journal entries, then search using the keyword Geralt. Continue to search until you find these lines:
 <key id="geralt">99817</key>
 <key id="geralt 0">99818</key>
We can use this method for any character in the game. Now, let's examine these lines.
, usually the first line is a key for the character's name. If we make another search using the keyword 99817, we'll find the line below:
<text id="99817">Geralt of Rivia</text>
So that means corresponds to .
If we use the same method for second line, we'll find the line below which is the journal entry about Geralt of Rivia:
<text id="99818">Behold our hero: subjected to mutations and rigorous sword and sorcery training as a child, he has become a superhuman monster slayer. Always penniless and often disdained by those whom he protects, he wanders the world seeking work. Fate has little mercy for him, piling obstacles in his way, yet he trudges on. He has more scruples than a beggaring bum has fleas. Doubts haunt him even when a band of ruffians, knives drawn, approaches him on the highway. Is he a good man? I do not think so. Does he try to maintain his humanity? I believe he does.<br>You must know that Geralt of Rivia died once already, or at least everyone thought him dead. During a massacre in Rivia, he sought to defend non-humans and fell to overwhelming odds. Placed in a boat, he floated into the mist, into a realm where he finally found peace. Not for long. Because of forces to be mentioned later, Geralt returned just in time to defend the witchers' ancient home fortress, and then embarked on a mission to recover the secrets stolen from it. Along the way he took part in a Scoia'tael uprising, shattered a powerful criminal organization, and killed the Grand Master of the Order of the Flaming Rose. All the while his fame as a lover grew. Well, that's Geralt for you. As if all this wasn't enough, he then foiled the attempted assassination of King Foltest of Temeria and became one of the monarch's most trusted men.</text>
We may use this simple method to find in-game text.