Whatsoever a Man Soweth... is the final main quest in the Hearts of Stone expansion. In this mission, Geralt of Rivia must decide whether or not to save Olgierd von Everec from Gaunter O'Dimm. The choice he makes results in the apparent death of one or the banishing of the other.
Walkthrough[]
Go to meet Olgierd's man at the Alchemy Inn, only to find Gaunter O'Dimm waiting for Geralt. Before you can approach him, a drunk intervenes and tries to talk to Geralt, at which point O'Dimm stops time so you can speak without interruptions. O'Dimm then tells Geralt that in order to fulfill the remainder of their contract, Geralt has to bring Olgierd to meet with him at the Temple of Lilvani. O'Dimm then leaves, but not before killing the drunk for interrupting their meeting. Once time resumes, Geralt speaks to Olgierd's man and tells him to inform Olgierd to meet at the temple. The man then informs Geralt that Shani wants to see him.
Final Goodbyes[]
If you choose to see Shani, you'll find her preparing to leave for the front lines to help as a medic for the soldiers. Geralt asks her if she found anything about Olgierd and she explains that she found someone who might know more about him, a Professor Premethine Shakeslock.
Follow Shani to the Oxenfurt Academy, where she'll convince the guards to allow her in, and she will help Geralt get inside another way before she leaves. Geralt somehow knows exactly where to go for this, but to save some time running around to the target objective, you can jump off the middle of the bridge to safely dive into the river. When you reach the place, kill the drowned dead and approach the wall, where Shani will drop you a rope to climb in.
When the cutscene ends, Shani will leave and you have to take care of some witch hunters. When done with them, you'll find the professor's residence locked up, so you have to find another way in. Climb some ladders and scaffoldings and jump onto to the small balcony at their end, where you'll have to Aard away a door. Unfortunately, the blast will also damage the structural beams of the house, which will have consequences later. You'll meet the professor downstairs, but you can examine some things on the way if you wish - nothing important, though there is a unique book on the second floor.
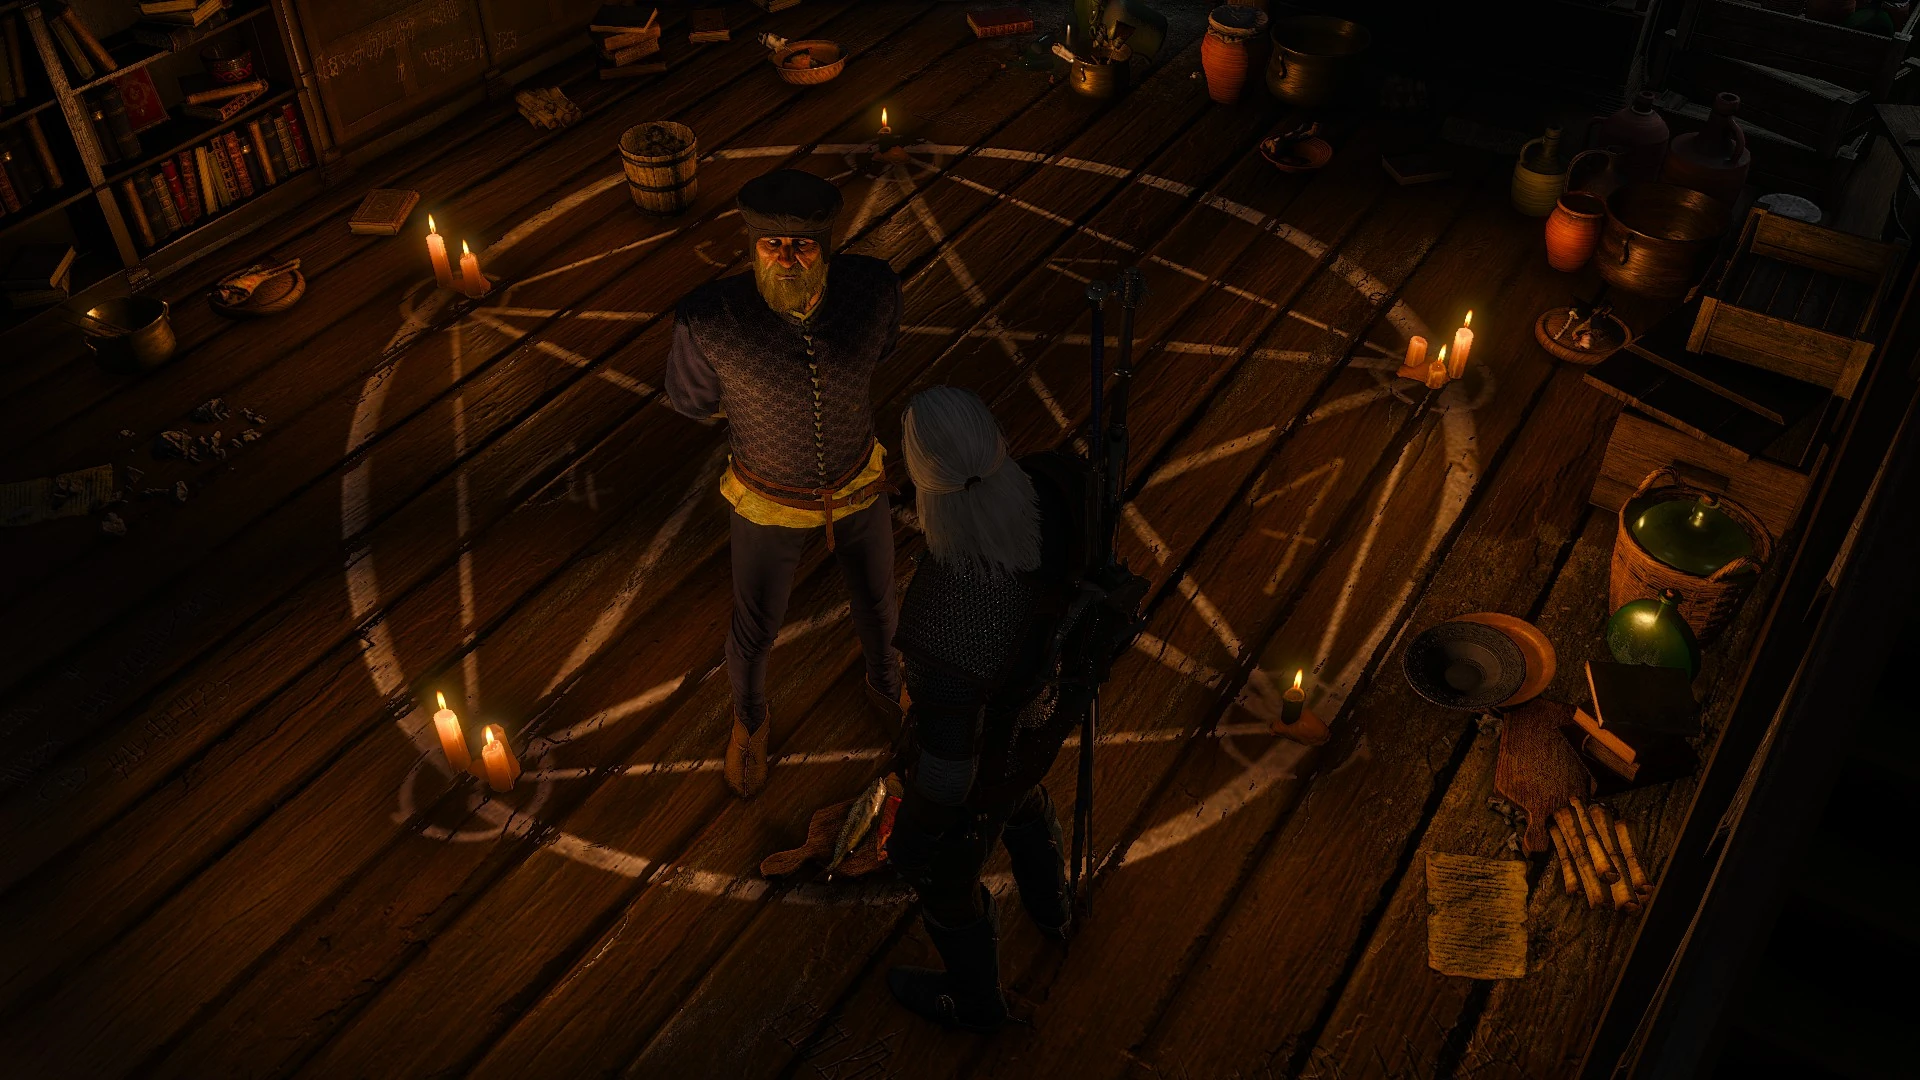
When you reach Shakeslock, it turns out that he's blind and, perhaps paranoid, refuses to leave a protective circle too. At first he thinks that Geralt was sent by O'Dimm, but will relax once the witcher explains what's going on. While you talk to him, he'll basically recap the main story so far, but it also turns out that Olgierd had to make a choice between losing Iris or Vlodimir, leading to his brother's death.

Shakeslock then tells Geralt that to defeat O'Dimm one must challenge him to a game of wits by putting up for grabs the only thing O'Dimm cares about having: one's soul. As the professor finishes explaining this, the wooden support beam above snaps and a bookcase begins to topple over. Geralt rushes in and keeps the bookcase from falling, but as Shakeslock steps back, he slips on a bottle, pushing him out of the protective circle, and immediately breaks his neck.
You can loot him for his journal and the key to the front door so you can exit. Outside, climb the wall tower from which you can jump into the river to leave. However, note that this is your only visit to the academy grounds, so now's the time to loot anything if you want.
Before you proceed to the next part, this is your last chance to meet Shani again for one last goodbye and you'll part as friends.
In the Temple of Lilvani[]
To reach the temple, you'll have to go through some caves east of Toderas, where you might've already been for Contract: Phantom of the Trade Route. If you have, there's a path to continue down instead of up where the draconoid nests were - that's where you need to go.
When you arrive, a cutscene starts and Geralt will give Olgierd the violet rose or a painting with it, fulfilling the third wish. Gaunter O'Dimm appear then, informing Olgierd that he has fulfilled their contract. As Olgierd starts to rebut this, saying the final part of the contract required them to meet on the moon, O'Dimm makes the dirt beneath them blow away, revealing a mosaic floor of the moon. If Geralt did not meet Shakeslock, O'Dimm claims Olgierd's soul and you can do nothing but watch. However, if you did meet the professor, you can challenge O'Dimm to a game of wits, where if Geralt loses, O'Dimm could then claim both Olgierd's and Geralt's souls, but if Geralt wins, they both go free.
Contract Fulfilled[]
If Master Mirror takes Olgierd's soul, the latter dies and O'Dimm offers you a reward:
- To be as swift as the wind. (Caparison of Lament)
- Never wanna go hungry again. (Horn of Plenty)
- A bottle of vodka that's always full. (Bottomless carafe)
- Make me rich. (5,000
 prior to Patch 4.0, 10,000 with it)
 - Don't want anything from you. (refuses any rewards)
- Geralt can ask him to find Ciri, though O'Dimm will say it is beyond even his power. He will, however, give advice on getting a more pleasant ending with Ciri but this is only available before The Isle of Mists quest
O'Dimm's challenge[]
If challenged to play for both souls, Gaunter puts you in a twisted world and explain the rules of the challenge. After the cutscene in which O'Dimm recites the riddle which he wants Geralt to solve, players will resume control and the clock starts ticking once Geralt passes through the temple threshold.
The bar representing Geralt's remaining time to complete the challenge will deplete over time (initially at a very slow but perceptible rate), and more when Geralt investigates various points of interest in the miniature world. Most of the points of interest in the world are decoys designed to waste time and increase O'Dimm's enjoyment of Geralt's predicament. O'Dimm has also deployed specters in this world resembling blackened versions of monsters Geralt has fought before. These monsters can be ignored but they give XP when killed and shouldn't be difficult to defeat provided Geralt's level is comparable to the quest recommendation. Monsters will adopt the Foglet, Hym, and Gargoyle templates.

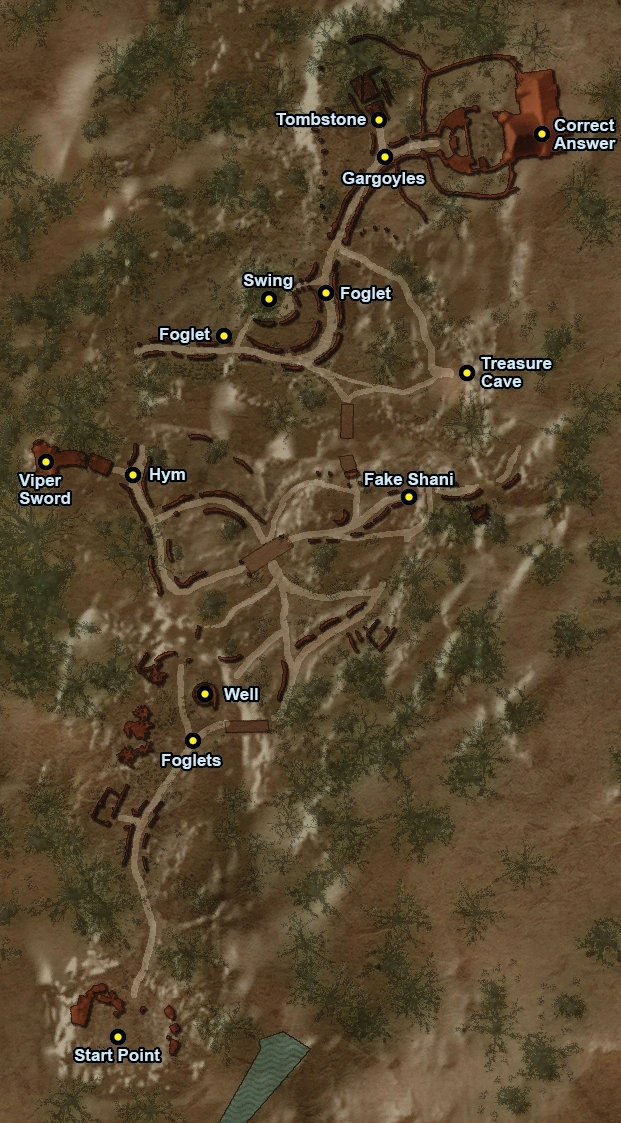
map of Gaunter's world
If you're having trouble on how to solve the riddle, follow these steps:
- Head down the path away from the temple.
- When the path forks, ignore the ruins on the left-hand side and follow the fork on the right.
- Kill or run past the Foglet specters, continue over the bridge.
- When the path splits again, take the left (it may look like 3 paths with another fork on the far left, but ignore that one)
- Continue straight along the path and go under the bridge, then take the left path. When the path splits, go right and you'll see a red glowing point of interest. Defeat the Hym specter around here. If you want the Viper venomous silver sword (or the legendary version on a New Game +) head up the stairs and take it out of the stone.
- Facing away from the stone, head left and follow until the split, then go left, towards the house on the hill.
- Defeat the two gargoyle specters in front of the house or run past them. O'Dimm will claim you're doing terribly, but ignore him and head into the house. There should be time to loot the items in the entrance hall.
- Make sure you have at least half your health, then go down the stairs, and head towards the mirror. (Quen will not help here)
- O'Dimm will taunt Geralt as time grows short. Rather than run around trying to find a mirror which won't be smashed by O'Dimm, look for the dry fountain in the courtyard (to the left, just behind another mirror that'll break). Geralt will give a similar hint to players if they've run around and smashed too many mirrors in this area.
- In the fountain, examine the dry steps near the cracked wall and use Aard on the wall to break it, starting a cutscene.
After successfully completing the challenge, you'll have a chat with Olgierd and he gives you his sword Iris for freeing him.
Regardless of your choice, the quest and story complete here. (200![]() )
)
Journal entry[]
- Having completed all of Olgierd von Everec's wishes, Geralt went to the Alchemy Inn, where he was to meet with the ataman's representative...
- With Shani's help, Geralt managed to enter the Academy grounds and speak to a Professor Shakeslock, who had earlier helped Olgierd in his attempts to break the pact with Master Mirror. The professor revealed that O'Dimm could be cheated – one needed only propose a wager, and, as an inveterate gambler, he was ligely[sic] to agree to take one up on it.
- If Geralt chooses to save Olgierd:
- Geralt took Professor Shakeslock's advice and proposed a wager to Master Mirror. Mirror agreed, but only if it was played out on his terms. He transported Geralt to a strange, dark world and made him solve a riddle. Geralt, who has always had a keen mind for such puzzles, soon found the solution and defeated Gaunter O'Dimm. Was this the last our world will ever see of him? No man can say...
- What mattered most at the moment, however, was that Olgierd von Everec was safe, and the pact which had bound him had been dissolved.
- If Geralt chooses to leave Olgierd's fate to Gaunter O'Dimm:
- Geralt decided not to dispute the arrangement between Gaunter O'Dimm and Olgierd. The pact was fufilled, and Olgierd's life came to an end.
Objectives[]
- Meet Olgierd's man at the Alchemy Inn.
- Meet Olgierd at the Temple of Lilvani.
- (Optional) Talk to Shani at her home.
- If Shani is sought out:
- (Optional) Follow Shani to the Academy.
- (Optional) Enter the Academy grounds.
- (Optional) Enter Professor Shakeslock's house.
- If one saves Olgierd:
- Find the solution to Master Mirror's riddle.
Notes[]
- When visiting Shani, the stuffed piglet toy which Geralt won for her at the wedding during the Dead Man's Party quest, can be seen in one of the chests she packed.
- At Professor Shakelock's home, if Geralt extinguishes all the candles on the protective circle an ominous sound will suddenly hiss through the room.
- Under normal circumstances (without console commands) the Viper venomous silver sword can only be attained if you choose to challenge Master Mirror for Olgierd's soul.
- If you decide to try and save Olgierd's soul, make sure you have a recent save. Saving is disabled inside it and if time runs out, it'll equal a game fail and you must re-load another save. However, the game makes a convenient checkpoint save at the start of the challenge.
- If you didn't play Shani and win her gwent card before the quest completed, you can find it in her clinic on the upstairs table.
- There is more than enough time to loot everything in the twisted world and leave the treasure cave with just about half of the time still left, provided that you know the path and don't go for the decoys. However, there's nothing of notable value except the Viper venomous silver sword.
Trivia[]
- The quest's name is a reference to the Bible passage Galatians 6:7.
- A guard at Oxenfurt Academy mentions that his injured knee is fully healed "as if no arrow had ever struck it", a clear reference to The Elder Scrolls V: Skyrim.