(can be taken in C IV) Tags: Visual edit apiedit |
m (→Walkthrough: clean up) |
||
| (29 intermediate revisions by 5 users not shown) | |||
| Line 1: | Line 1: | ||
| + | {{Infobox Quest1 |
||
| − | {{Quest| |
||
| ⚫ | |||
| − | QuestName=Sweet Revenge| |
||
| + | |Location =[[Old manor]] |
||
| ⚫ | |||
| − | + | |Given by=[[King Foltest]] |
|
| ⚫ | |||
| − | Given by=[[King Foltest]]| |
||
| ⚫ | |||
| ⚫ | |||
| ⚫ | |||
| ⚫ | |||
| + | |Type = main |
||
| ⚫ | |||
| + | |Name = {{PAGENAME}} |
||
| − | }} |
||
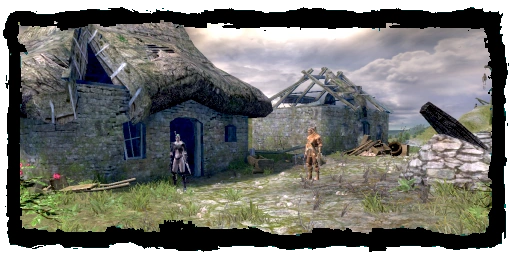
| ⚫ | |Image = Scenes DeWett Old Manor.png}}'''Sweet Revenge''' is a [[The Witcher primary quests|quest]] given to [[Geralt of Rivia|Geralt]] by either [[Dandelion]] in Chapter IV right before the departure to Old Vizima, or [[King Foltest]] in Chapter V. It is the culmination of Geralt's quest to eradicate [[Salamandra]] and takes the witcher to the [[old manor|Old Manor]]. |
||
| − | |||
| − | [[Image:Primary quests.png|32px|link=Primary quests]] |
||
| − | |||
| ⚫ | '''Sweet Revenge''' is a [[ |
||
== Walkthrough == |
== Walkthrough == |
||
| − | This quest actually begins much earlier in Chapter V, but the action only really starts after we find our hero emerging from the [[Striga's crypt]], having earlier been locked in by [[Velerad]]. The two men have a little exchange in which the witcher "thanks" the burgomeister for that little surprise, but then they get down to business. [[Geralt]] may or may not have killed the [[striga]] (his choice) but that has little impact on what follows. |
+ | This quest actually begins much earlier in Chapter V, but the action only really starts after we find our hero emerging from the [[Striga's crypt]], having earlier been locked in by [[Velerad]]. The two men have a little exchange in which the witcher "thanks" the burgomeister for that little surprise, but then they get down to business. [[Geralt of Rivia|Geralt]] may or may not have killed the [[striga]] (his choice) but that has little impact on what follows. |
| ⚫ | |||
| − | {|border="0" cellpadding="0" cellspacing="0" width="100%" |
||
| ⚫ | |||
| − | |- |
||
| − | | width=30 | |
||
| ⚫ | |||
| − | | width=30 | |
||
| − | |- |
||
| − | | width=30 | |
||
| ⚫ | |||
| − | | width=30 | |
||
| − | |} |
||
Velerad then tells Geralt that the [[Foltest|King]] has a message for him: "To cure the 'disease', go to the [[old manor]]". That is pretty clear. So, it is off to the old manor to finally confront [[Azar Javed]] and put an end to [[Salamandra]] once and for all. |
Velerad then tells Geralt that the [[Foltest|King]] has a message for him: "To cure the 'disease', go to the [[old manor]]". That is pretty clear. So, it is off to the old manor to finally confront [[Azar Javed]] and put an end to [[Salamandra]] once and for all. |
||
| ⚫ | Upon entering the area, Geralt meets [[Roderick de Wett|de Wett]] and a handful of knights of the [[Order of the Flaming Rose|Order]]. The two speak and de Wett slips up when the witcher mentions having found a diary in the crypt. The count stupidly refers to the diary as [[Ostrit's journal|Ostrit's diary]]. Not being one to let details like these slip by unnoticed, Geralt calls de Wett out on this little slip of the tongue. The Count, rather than back-pedalling, admits that he knew all about Adda's curse. He also suggests that he is actually just using [[Salamandra]] to achieve his own goals. He goes so far as to invite the witcher to join him, promising rich rewards. But our hero is steadfast and will have none of it. Naturally this can only be settled with a duel. |
||
| − | [[Image:Scenes DeWett Old Manor.png|right|300px|De Wett in the swamp]] |
||
| ⚫ | Upon entering the area, Geralt meets [[Roderick de Wett|de Wett]] and a handful of knights of the [[Order of the Flaming Rose|Order]]. The two speak and de Wett slips up when the witcher mentions having found a diary in the crypt. The count stupidly refers to the diary as |
||
One duel, one dead [[Nilfgaardian Empire|Nilfgaardian]] count and a handful of Order corpses later, Geralt is on his way to the old manor proper. A few more obstacles throw themselves in his path, however. There is, of course, the usual complement of [[drowner]]s, [[drowned dead]], [[bloedzuiger]]s, and [[Dagon worshipper]]s, but after deftly navigating those, our hero continues climbing the hill towards the [[Old manor house|manor]]. When he reaches the [[ruined village]], he comes upon Azar Javed, with Rayla! But it is no longer truly [[White Rayla]], she has obviously been subjected to the dreaded Salamandra experiments and is now just an "enslaved bag of blood and muscles", albeit pretty [[Illegal Sword|well armed]] and capable (she can now blind opponents). |
One duel, one dead [[Nilfgaardian Empire|Nilfgaardian]] count and a handful of Order corpses later, Geralt is on his way to the old manor proper. A few more obstacles throw themselves in his path, however. There is, of course, the usual complement of [[drowner]]s, [[drowned dead]], [[bloedzuiger]]s, and [[Dagon worshipper]]s, but after deftly navigating those, our hero continues climbing the hill towards the [[Old manor house|manor]]. When he reaches the [[ruined village]], he comes upon Azar Javed, with Rayla! But it is no longer truly [[White Rayla]], she has obviously been subjected to the dreaded Salamandra experiments and is now just an "enslaved bag of blood and muscles", albeit pretty [[Illegal Sword|well armed]] and capable (she can now blind opponents). |
||
| − | [[ |
+ | [[File:Scenes Azar and Rayla.png|right|300px|Javed and a mutated Rayla]] |
| − | Azar does his usual taunting and disappearing act, leaving his newest "perfect creation" to deal with the witcher. Good thing the mage reanimated Rayla, since he can no longer rely on the [[Professor ( |
+ | Azar does his usual taunting and disappearing act, leaving his newest "perfect creation" to deal with the witcher. Good thing the mage reanimated Rayla, since he can no longer rely on the [[Professor (assassin)|Professor]] to fight his battles for him! Needless to say, the witcher does what he does best and puts Rayla to rest, finally and permanently. Then he presses onward toward his goal. |
| − | Beyond the ruined village is where the action really begins to heat up. Within the courtyard of the [[Old manor house|manor]], Geralt can see his allies busily fighting a large number of Salamandra and these guys are of the mutated variety. There are [[armored hound]]s, [[ |
+ | Beyond the ruined village is where the action really begins to heat up. Within the courtyard of the [[Old manor house|manor]], Geralt can see his allies busily fighting a large number of Salamandra and these guys are of the mutated variety. There are [[armored hound]]s, [[mutant (creature)|mutant]]s, [[mutant assassin]]s, and [[greater mutant]]s. |
| − | + | <div class="divTable" style="width:100%;"> |
|
| + | <div class="divTableBody"> |
||
| − | |- |
||
| + | <div class="divTableRow"> |
||
| − | | width=30 | |
||
| + | <div class="divTableCell" style="width:10%;">{{path-elves}}</div> |
||
| − | + | <div class="divTableCell" style="vertical-align:middle; width:90%;">It is [[Yaevinn]] and a band of [[elf|elves]] and [[dwarf|dwarves]] who are fighting in the courtyard.</div></div> |
|
| − | | width=30 | |
||
| + | <div class="divTableRow"> |
||
| − | |- |
||
| + | <div class="divTableCell" style="width:10%;">{{path-order}}</div> |
||
| − | | width=30 | |
||
| − | + | <div class="divTableCell" style="vertical-align:middle; width:90%;">It is [[Siegfried of Denesle|Siegfried]] and some knights of the Order.</div></div> |
|
| + | <div class="divTableRow"> |
||
| − | | width=30 | |
||
| + | <div class="divTableCell" style="width:10%;">{{path-neutral}}</div> |
||
| − | |- |
||
| + | <div class="divTableCell" style="vertical-align:middle; width:90%;">He meets [[Triss]] aided by [[City Guard]]smen.</div></div></div> |
||
| − | | width=30 | |
||
| + | </div> |
||
| − | | '''Witcher / neutral path''': He meets [[Triss]] aided by [[City Guard]]smen. |
||
| − | | width=30 | |
||
| − | |} |
||
Not one to let his friends fight alone, the witcher joins in the action. But once that threat has been eliminated, our hero must continue and somehow enter the [[Old manor catacombs|catacombs]] beneath the old manor. Again, his ally proves useful. |
Not one to let his friends fight alone, the witcher joins in the action. But once that threat has been eliminated, our hero must continue and somehow enter the [[Old manor catacombs|catacombs]] beneath the old manor. Again, his ally proves useful. |
||
| − | + | <div class="divTable" style="width:100%;"> |
|
| + | <div class="divTableBody"> |
||
| − | |- |
||
| + | <div class="divTableRow"> |
||
| − | | width=30 | |
||
| + | <div class="divTableCell" style="width:10%;">{{path-elves}}</div> |
||
| − | + | <div class="divTableCell" style="vertical-align:middle; width:90%;">Yaevinn tells him about a well shaft that he can squeeze through to enter the catacombs.</div></div> |
|
| − | | width=30 | |
||
| + | <div class="divTableRow"> |
||
| − | |- |
||
| + | <div class="divTableCell" style="width:10%;">{{path-order}}</div> |
||
| − | | width=30 | |
||
| − | + | <div class="divTableCell" style="vertical-align:middle; width:90%;">Siegfried tells him about a cave, once inside he only needs to go straight until he finds a small passage.</div></div> |
|
| + | <div class="divTableRow"> |
||
| − | | width=30 | |
||
| + | <div class="divTableCell" style="width:10%;">{{path-neutral}}</div> |
||
| − | |- |
||
| ⚫ | |||
| − | | width=30 | |
||
| + | </div> |
||
| ⚫ | |||
| − | | width=30 | |
||
| − | |} |
||
Each entrance leaves the witcher at a different starting point in the catacombs (see the [[#Map|map]] below), but the destination remains the same: [[Javed's laboratory]]. |
Each entrance leaves the witcher at a different starting point in the catacombs (see the [[#Map|map]] below), but the destination remains the same: [[Javed's laboratory]]. |
||
| − | Geralt then fights his way through the catacombs, meeting Javed twice more and twice more the sorcerer tries to leave the witcher to his minions while fleeing. The first encounter has Javed leaving our hero to face a [[koshchey]] he has conjured, assuming, wrongly once again |
+ | Geralt then fights his way through the catacombs, meeting Javed twice more and twice more the sorcerer tries to leave the witcher to his minions while fleeing. The first encounter has Javed leaving our hero to face a [[koshchey]] he has conjured, assuming, wrongly once again - when will this guy learn? - that the beast will make quick work of Geralt. No such luck. The second encounter features two "[[greater brother]]s", but they are no more successful at stopping the witcher than the koshchey was. There is no time to savour the victory, however as our hero is immediately teleported, courtesy of Azar to a new destination: Javed's lab. |
It is time for the final confrontation! There is the usual grandiose evil overlord speech, complete with the standard evil overlord miscalculations and then it is down to business. |
It is time for the final confrontation! There is the usual grandiose evil overlord speech, complete with the standard evil overlord miscalculations and then it is down to business. |
||
| ⚫ | |||
| − | {|border="0" cellpadding="0" cellspacing="0" width="100%" |
||
| ⚫ | |||
| − | |- |
||
| − | | width=30 | |
||
| ⚫ | |||
| − | | width=30 | |
||
| − | |- |
||
| − | | width=30 | |
||
| ⚫ | |||
| − | | width=30 | |
||
| − | |} |
||
Ha! Good-bye Azar! But wait. It is not over yet. Geralt barely has time to check Javed's body for loot, I mean the stolen Witchers' secrets, when he hears a vaguely familiar voice calling the now deceased mage. It is the [[Grand Master]] via [[telecommunicator]]! How very interesting. This can mean only one thing. It seems Javed was not the mastermind after all, it was [[Jacques de Aldersberg]] all along. That explains why Javed did not have the secrets on his person, nor anywhere in the lab. The Grand Master has them. The witcher vows then and there to find the Grand Master and really finish things. |
Ha! Good-bye Azar! But wait. It is not over yet. Geralt barely has time to check Javed's body for loot, I mean the stolen Witchers' secrets, when he hears a vaguely familiar voice calling the now deceased mage. It is the [[Grand Master]] via [[telecommunicator]]! How very interesting. This can mean only one thing. It seems Javed was not the mastermind after all, it was [[Jacques de Aldersberg]] all along. That explains why Javed did not have the secrets on his person, nor anywhere in the lab. The Grand Master has them. The witcher vows then and there to find the Grand Master and really finish things. |
||
| + | ==Koshchey Tactic== |
||
| − | |||
| + | *The Koshchey has an amazingly strong [[Bleeding]] effect even if Geralt has 220% resistance to bleeding it's almost unavoidable. However, most other effects can be avoided with [[Willow]] and [[Altered Metabolism]] as together they give immunity to [[Poison]], [[Pain]], [[Knockdown]] and [[Stun]]. |
||
| ⚫ | |||
| + | *The best way to deal with the Koshchey is to hit it with full strengh and kill it as fast as you can. Apply [[Perun]] to your [[The Witcher silver swords|Silver Sword]] (preferably [[Moonblade]]) or [[Insectoid Oil]] if you are wierd. Drink [[Thunderbolt]] preferably with [[Nigredo]], you should also boost your signs with [[Petri's Philter]]. Also use a [[Swallow]], best if it has the [[Rubedo]] effect added to it, while it won't counter the bleeding it will keep Geralt alive as the damage from Bleeding will drop after Geralt's health drops. Add any other Potion you may find useful if your [[toxicity]] is not at +50% yet, as you need that for Altered Metabolism to take effect. |
||
| − | [[File:Killing Azar Javed|thumb|500px|left|Sweet Revenge: Killing Azar Javed]] |
||
| + | *Now once you are facing the Koshchey hit it with an [[Aard]] to knock it down and start hacking at it, if you are fast enough you may actually kill it before it has a chance to apply bleeding. If it manages to break your combo use [[Igni]] and then finish it off. |
||
| − | <br style="clear:left;" /> |
||
| + | ==Azar Javed Tactic== |
||
| + | *Azar is arguably more easy than the Koshchey, however he is far more annoying due to the fact he uses multiple "shut down" [[critical effects]], he can cause knockdown, stun, and blind. While Willow can solve the first two there is no way to avoid the blinding effect and he uses it quite often. However he cannot cause bleeding and that is your advantage. |
||
| + | *Same as with Koshchey use Willow and Altered Metabolism, however unlike it the best way to deal with Azar is in fact a magic duel, so best potions for the job are Petri's Philter and [[Tawny Owl]]. |
||
| + | *Azar can actually be afflicted with [[poison]] using [[Yrden]] and [[Devil's Puffball]]. [[Hanged Man's Venom]] however '''WILL NOT WORK''', don't ask why it just doesn't. Using [[Brown Oil]] to cause bleeding also doesn't work which is another reason why using a sword for the fight is not the best idea. |
||
| + | *When the fight starts use [[Quen (character development)|Level 5 Quen]] to avoid all his damage. He will still be able to blind Geralt but he won't be able hit him. Now use Devil's Puffball and follow up with Yrden and just keep luring Azar into it, good news is that neither will remove your Quen when used, so apart from the blinding it's a one side battle. Even if your Yrden doesn't have the [[Crippling Sign]] talent you should still use it as it's still additional damage. If the poison runs out use another Devil's Puffball. |
||
| + | *You can also use Igni if you like, but Igni will remove Quen when used so if Geralt gets blinded while it's down he will become vulnerable to Azar's attacks. |
||
== Notes == |
== Notes == |
||
* The battle with the koshchey can result in a large percentage of vitality damage through bleeding very quickly. Good preparation is key for this battle, and some players prefer to use a [[Kiss]] potion for this fight. |
* The battle with the koshchey can result in a large percentage of vitality damage through bleeding very quickly. Good preparation is key for this battle, and some players prefer to use a [[Kiss]] potion for this fight. |
||
| − | * The koshchey is one of the toughest battles in the game. It is able to strike from outside your range, hits over your attacks, and is capable of inflicting intense bleeding, stuns and knockdowns. With this in mind, it is worth simply not fighting it at all. Take a [[Tawny Owl]] potion before facing it and use the [[Igni]] spell repeatedly, using the pillars in the |
+ | * The koshchey is one of the toughest battles in the game. It is able to strike from outside your range, hits over your attacks, and is capable of inflicting intense bleeding, stuns and knockdowns. With this in mind, it is worth simply not fighting it at all. Take a [[Tawny Owl]] potion before facing it and use the [[Igni]] spell repeatedly, using the pillars in the center of the room to kite it. |
| − | * When facing Azar, I have found that it is useful to take [[Swallow]], [[Full Moon]] and [[Willow]] before the battle (if you rely more on magic, then maybe a [[Maribor Forest]] as well). I usually take these before facing the greater brothers as there really is not a chance later. I take Full Moon and Willow first (since they last 8 hours) and then meditate for 1 hour to remove the toxic effects (there are two campfires in the catacombs, one at the Scoia'tael entrance and one at the Order entrance), then I take the Swallow and get on with the confrontation. |
+ | * When facing Azar, I have found that it is useful to take [[Swallow]], [[Full Moon]] and [[Willow]] before the battle (if you rely more on magic, then maybe a [[Maribor Forest (potion)|Maribor Forest]] as well). I usually take these before facing the greater brothers as there really is not a chance later. I take Full Moon and Willow first (since they last 8 hours) and then meditate for 1 hour to remove the toxic effects (there are two campfires in the catacombs, one at the Scoia'tael entrance and one at the Order entrance), then I take the Swallow and get on with the confrontation. |
* While fighting alongside Berengar, it is possible to defeat Azar before he kills him. Doing this will prevent the diary entry about "Berengar's death" to show up. Geralt can also talk to Berengar after the fight, but he will only reply with "I needed to think". |
* While fighting alongside Berengar, it is possible to defeat Azar before he kills him. Doing this will prevent the diary entry about "Berengar's death" to show up. Geralt can also talk to Berengar after the fight, but he will only reply with "I needed to think". |
||
| − | * Azar is actually susceptible to fire ([[ |
+ | * Azar is actually susceptible to fire ([[Igni]]), which I found surprising as it is his element of choice and [[Ramsmeat]] described him as having a fetish about it which scared the prostitutes, but I digress... |
| + | * Azar has a moat around his workshop and he has a racetrack around his moat. You can use the [[Yrden]] sign to makes persuers stop moving and then use an Igni sign that damages targets at range. Place the Yrden just after a pillar to maximise how long he gets stuck. |
||
== Maps == |
== Maps == |
||
| − | <gallery |
+ | <gallery> |
| − | + | File:Map Old Manor catacombs entrances exterior.png|exterior entrances |
|
| − | + | File:Map_Old_Manor_catacombs_entrances.png|interior arrival points |
|
</gallery> |
</gallery> |
||
| Line 112: | Line 95: | ||
=== Salamandra === |
=== Salamandra === |
||
| − | Foltest wants me to deal with the Salamandra |
+ | Foltest wants me to deal with the Salamandra - once and for all. I hope the king proves a trustworthy ally. ''I must dismantle Salamandra at the behest of the king himself.'' |
=== The Experiment === |
=== The Experiment === |
||
| Line 118: | Line 101: | ||
=== Zoltan / Siegfried / Shani === |
=== Zoltan / Siegfried / Shani === |
||
| − | {| |
||
| − | |- |
||
| − | | width=30 | |
||
| − | | {{path-elves}} |
||
| ⚫ | |||
| − | | width=30 | |
||
| − | |- |
||
| − | | width=30 | |
||
| − | | {{path-order}} |
||
| ⚫ | |||
| − | | width=30 | |
||
| − | |- |
||
| − | | width=30 | |
||
| − | | {{path-neutral}} |
||
| ⚫ | |||
| − | | width=30 | |
||
| − | |} |
||
| + | <div class="divTable" style="width:100%;"> |
||
| + | <div class="divTableBody"> |
||
| + | <div class="divTableRow"> |
||
| + | <div class="divTableCell" style="width:10%;">{{path-elves}}</div> |
||
| ⚫ | |||
| + | <div class="divTableRow"> |
||
| + | <div class="divTableCell" style="width:10%;">{{path-order}}</div> |
||
| ⚫ | |||
| + | <div class="divTableRow"> |
||
| + | <div class="divTableCell" style="width:10%;">{{path-neutral}}</div> |
||
| ⚫ | |||
| + | </div> |
||
=== A Hint === |
=== A Hint === |
||
The king used [[Velerad]] to pass on a hint about Salamandra. I need to go to the [[Old Manor]]. Apparently, I'll find what I'm looking for there. ''I must go to the Old Manor, where I shall find what I'm looking for.'' |
The king used [[Velerad]] to pass on a hint about Salamandra. I need to go to the [[Old Manor]]. Apparently, I'll find what I'm looking for there. ''I must go to the Old Manor, where I shall find what I'm looking for.'' |
||
| Line 149: | Line 127: | ||
=== Entering the Catacombs === |
=== Entering the Catacombs === |
||
| − | {| |
||
| − | |- |
||
| − | | width=30 | |
||
| − | | {{path-elves}} |
||
| ⚫ | |||
| − | | width=30 | |
||
| − | |- |
||
| − | | width=30 | |
||
| − | | {{path-order}} |
||
| ⚫ | |||
| − | | width=30 | |
||
| − | |- |
||
| − | | width=30 | |
||
| − | | {{path-neutral}} |
||
| ⚫ | |||
| − | | width=30 | |
||
| − | |} |
||
| + | <div class="divTable" style="width:100%;"> |
||
| + | <div class="divTableBody"> |
||
| + | <div class="divTableRow"> |
||
| + | <div class="divTableCell" style="width:10%;">{{path-elves}}</div> |
||
| ⚫ | |||
| + | <div class="divTableRow"> |
||
| + | <div class="divTableCell" style="width:10%;">{{path-order}}</div> |
||
| ⚫ | |||
| + | <div class="divTableRow"> |
||
| + | <div class="divTableCell" style="width:10%;">{{path-neutral}}</div> |
||
| ⚫ | |||
| + | </div> |
||
=== A Sacrifice === |
=== A Sacrifice === |
||
| − | {| |
||
| − | |- |
||
| − | | width=30 | |
||
| − | | {{path-elves}} |
||
| ⚫ | |||
| − | | width=30 | |
||
| − | |- |
||
| − | | width=30 | |
||
| − | | {{path-order}} |
||
| ⚫ | |||
| − | | width=30 | |
||
| − | |- |
||
| − | | width=30 | |
||
| − | | {{path-neutral}} |
||
| ⚫ | |||
| − | | width=30 | |
||
| − | |} |
||
| + | <div class="divTable" style="width:100%;"> |
||
| + | <div class="divTableBody"> |
||
| + | <div class="divTableRow"> |
||
| + | <div class="divTableCell" style="width:10%;">{{path-elves}}</div> |
||
| ⚫ | |||
| + | <div class="divTableRow"> |
||
| + | <div class="divTableCell" style="width:10%;">{{path-order}}</div> |
||
| ⚫ | |||
| + | <div class="divTableRow"> |
||
| + | <div class="divTableCell" style="width:10%;">{{path-neutral}}</div> |
||
| ⚫ | <div class="divTableCell" style="vertical-align:middle; width:90%;">Triss decided to make a stand by the entrance, face the enemy there. She nearly forced me to descend. I need to hurry so her sacrifice is not in vain. ''I must descend and deal with Salamandra - once and for all.''</div></div></div> |
||
| + | </div> |
||
=== The Koshchey === |
=== The Koshchey === |
||
I killed the koshchey, one of the most fearsome monsters I ever dealt with. I must press on and find Salamandra's leader. ''I must go on and find Salamandra's leader.'' |
I killed the koshchey, one of the most fearsome monsters I ever dealt with. I must press on and find Salamandra's leader. ''I must go on and find Salamandra's leader.'' |
||
| Line 195: | Line 163: | ||
I couldn't find the witchers' secrets, but that hardly brings my search to an end. I must warn the king of the Grand Master's intentions. He may have stolen the secrets. |
I couldn't find the witchers' secrets, but that hardly brings my search to an end. I must warn the king of the Grand Master's intentions. He may have stolen the secrets. |
||
| + | <div class="divTable" style="width:100%;"> |
||
| − | {| |
||
| + | <div class="divTableBody"> |
||
| − | |- |
||
| + | <div class="divTableRow"> |
||
| − | | width=30 | |
||
| − | + | <div class="divTableCell" style="width:10%;">{{path-elves}}</div> |
|
| − | + | <div class="divTableCell" style="vertical-align:middle; width:90%;">Yaevinn has arranged transport to the Temple Quarter. We're to meet at the landing, where a boat awaits us. ''I must warn the king. Yaevinn awaits at the landing with a boat that will take us to Vizima.''</div></div> |
|
| + | <div class="divTableRow"> |
||
| − | | width=30 | |
||
| + | <div class="divTableCell" style="width:10%;">{{path-order}}</div> |
||
| − | |- |
||
| ⚫ | |||
| − | | width=30 | |
||
| + | <div class="divTableRow"> |
||
| − | | {{path-order}} |
||
| + | <div class="divTableCell" style="width:10%;">{{path-neutral}}</div> |
||
| ⚫ | |||
| ⚫ | |||
| − | | width=30 | |
||
| + | </div> |
||
| − | |- |
||
| − | | width=30 | |
||
| − | | {{path-neutral}} |
||
| ⚫ | |||
| − | | width=30 | |
||
| − | |} |
||
| − | |||
=== The King === |
=== The King === |
||
We are sailing to Vizima to warn the king and to bring the Grand Master to justice. ''We are sailing to Vizima.'' (6000 XP) |
We are sailing to Vizima to warn the king and to bring the Grand Master to justice. ''We are sailing to Vizima.'' (6000 XP) |
||
| ⚫ | |||
| + | <gallery position="center"> |
||
| + | File:Killing Azar Javed |
||
| + | </gallery> |
||
[[cs:Chuť pomsty]] |
[[cs:Chuť pomsty]] |
||
Revision as of 18:52, 16 February 2020
Sweet Revenge is a quest given to Geralt by either Dandelion in Chapter IV right before the departure to Old Vizima, or King Foltest in Chapter V. It is the culmination of Geralt's quest to eradicate Salamandra and takes the witcher to the Old Manor.
Walkthrough
This quest actually begins much earlier in Chapter V, but the action only really starts after we find our hero emerging from the Striga's crypt, having earlier been locked in by Velerad. The two men have a little exchange in which the witcher "thanks" the burgomeister for that little surprise, but then they get down to business. Geralt may or may not have killed the striga (his choice) but that has little impact on what follows.
- Geralt saved Adda: Velerad rewards the witcher with D'yaebl, a nice steel sword, but possibly not as nice as the one Geralt is already carrying at that point.
- Geralt killed the striga: no sword, and no more interaction with the Princess or striga, since she is dead.
Velerad then tells Geralt that the King has a message for him: "To cure the 'disease', go to the old manor". That is pretty clear. So, it is off to the old manor to finally confront Azar Javed and put an end to Salamandra once and for all.
Upon entering the area, Geralt meets de Wett and a handful of knights of the Order. The two speak and de Wett slips up when the witcher mentions having found a diary in the crypt. The count stupidly refers to the diary as Ostrit's diary. Not being one to let details like these slip by unnoticed, Geralt calls de Wett out on this little slip of the tongue. The Count, rather than back-pedalling, admits that he knew all about Adda's curse. He also suggests that he is actually just using Salamandra to achieve his own goals. He goes so far as to invite the witcher to join him, promising rich rewards. But our hero is steadfast and will have none of it. Naturally this can only be settled with a duel.
One duel, one dead Nilfgaardian count and a handful of Order corpses later, Geralt is on his way to the old manor proper. A few more obstacles throw themselves in his path, however. There is, of course, the usual complement of drowners, drowned dead, bloedzuigers, and Dagon worshippers, but after deftly navigating those, our hero continues climbing the hill towards the manor. When he reaches the ruined village, he comes upon Azar Javed, with Rayla! But it is no longer truly White Rayla, she has obviously been subjected to the dreaded Salamandra experiments and is now just an "enslaved bag of blood and muscles", albeit pretty well armed and capable (she can now blind opponents).
Azar does his usual taunting and disappearing act, leaving his newest "perfect creation" to deal with the witcher. Good thing the mage reanimated Rayla, since he can no longer rely on the Professor to fight his battles for him! Needless to say, the witcher does what he does best and puts Rayla to rest, finally and permanently. Then he presses onward toward his goal.
Beyond the ruined village is where the action really begins to heat up. Within the courtyard of the manor, Geralt can see his allies busily fighting a large number of Salamandra and these guys are of the mutated variety. There are armored hounds, mutants, mutant assassins, and greater mutants.
Not one to let his friends fight alone, the witcher joins in the action. But once that threat has been eliminated, our hero must continue and somehow enter the catacombs beneath the old manor. Again, his ally proves useful.
Each entrance leaves the witcher at a different starting point in the catacombs (see the map below), but the destination remains the same: Javed's laboratory.
Geralt then fights his way through the catacombs, meeting Javed twice more and twice more the sorcerer tries to leave the witcher to his minions while fleeing. The first encounter has Javed leaving our hero to face a koshchey he has conjured, assuming, wrongly once again - when will this guy learn? - that the beast will make quick work of Geralt. No such luck. The second encounter features two "greater brothers", but they are no more successful at stopping the witcher than the koshchey was. There is no time to savour the victory, however as our hero is immediately teleported, courtesy of Azar to a new destination: Javed's lab.
It is time for the final confrontation! There is the usual grandiose evil overlord speech, complete with the standard evil overlord miscalculations and then it is down to business.
- If Geralt spared Berengar in Chapter IV: Berengar faithfully shows up with every intention of helping Geralt, but sadly his skills appear to be rustier than he bargained for.
- If Geralt killed Berengar: Javed suddenly notices that Geralt happens to be wearing not only his own medallion, but Berengar's as well. The mage comments that "even with the medallion" the witcher has no chance.
Ha! Good-bye Azar! But wait. It is not over yet. Geralt barely has time to check Javed's body for loot, I mean the stolen Witchers' secrets, when he hears a vaguely familiar voice calling the now deceased mage. It is the Grand Master via telecommunicator! How very interesting. This can mean only one thing. It seems Javed was not the mastermind after all, it was Jacques de Aldersberg all along. That explains why Javed did not have the secrets on his person, nor anywhere in the lab. The Grand Master has them. The witcher vows then and there to find the Grand Master and really finish things.
Koshchey Tactic
- The Koshchey has an amazingly strong Bleeding effect even if Geralt has 220% resistance to bleeding it's almost unavoidable. However, most other effects can be avoided with Willow and Altered Metabolism as together they give immunity to Poison, Pain, Knockdown and Stun.
- The best way to deal with the Koshchey is to hit it with full strengh and kill it as fast as you can. Apply Perun to your Silver Sword (preferably Moonblade) or Insectoid Oil if you are wierd. Drink Thunderbolt preferably with Nigredo, you should also boost your signs with Petri's Philter. Also use a Swallow, best if it has the Rubedo effect added to it, while it won't counter the bleeding it will keep Geralt alive as the damage from Bleeding will drop after Geralt's health drops. Add any other Potion you may find useful if your toxicity is not at +50% yet, as you need that for Altered Metabolism to take effect.
- Now once you are facing the Koshchey hit it with an Aard to knock it down and start hacking at it, if you are fast enough you may actually kill it before it has a chance to apply bleeding. If it manages to break your combo use Igni and then finish it off.
Azar Javed Tactic
- Azar is arguably more easy than the Koshchey, however he is far more annoying due to the fact he uses multiple "shut down" critical effects, he can cause knockdown, stun, and blind. While Willow can solve the first two there is no way to avoid the blinding effect and he uses it quite often. However he cannot cause bleeding and that is your advantage.
- Same as with Koshchey use Willow and Altered Metabolism, however unlike it the best way to deal with Azar is in fact a magic duel, so best potions for the job are Petri's Philter and Tawny Owl.
- Azar can actually be afflicted with poison using Yrden and Devil's Puffball. Hanged Man's Venom however WILL NOT WORK, don't ask why it just doesn't. Using Brown Oil to cause bleeding also doesn't work which is another reason why using a sword for the fight is not the best idea.
- When the fight starts use Level 5 Quen to avoid all his damage. He will still be able to blind Geralt but he won't be able hit him. Now use Devil's Puffball and follow up with Yrden and just keep luring Azar into it, good news is that neither will remove your Quen when used, so apart from the blinding it's a one side battle. Even if your Yrden doesn't have the Crippling Sign talent you should still use it as it's still additional damage. If the poison runs out use another Devil's Puffball.
- You can also use Igni if you like, but Igni will remove Quen when used so if Geralt gets blinded while it's down he will become vulnerable to Azar's attacks.
Notes
- The battle with the koshchey can result in a large percentage of vitality damage through bleeding very quickly. Good preparation is key for this battle, and some players prefer to use a Kiss potion for this fight.
- The koshchey is one of the toughest battles in the game. It is able to strike from outside your range, hits over your attacks, and is capable of inflicting intense bleeding, stuns and knockdowns. With this in mind, it is worth simply not fighting it at all. Take a Tawny Owl potion before facing it and use the Igni spell repeatedly, using the pillars in the center of the room to kite it.
- When facing Azar, I have found that it is useful to take Swallow, Full Moon and Willow before the battle (if you rely more on magic, then maybe a Maribor Forest as well). I usually take these before facing the greater brothers as there really is not a chance later. I take Full Moon and Willow first (since they last 8 hours) and then meditate for 1 hour to remove the toxic effects (there are two campfires in the catacombs, one at the Scoia'tael entrance and one at the Order entrance), then I take the Swallow and get on with the confrontation.
- While fighting alongside Berengar, it is possible to defeat Azar before he kills him. Doing this will prevent the diary entry about "Berengar's death" to show up. Geralt can also talk to Berengar after the fight, but he will only reply with "I needed to think".
- Azar is actually susceptible to fire (Igni), which I found surprising as it is his element of choice and Ramsmeat described him as having a fetish about it which scared the prostitutes, but I digress...
- Azar has a moat around his workshop and he has a racetrack around his moat. You can use the Yrden sign to makes persuers stop moving and then use an Igni sign that damages targets at range. Place the Yrden just after a pillar to maximise how long he gets stuck.
Maps
")
")
Phases
A Lead
It seems I must go to Old Vizima to hunt down the Salamandra boss. All the clues lead there. I must go to Old Vizima to hunt down the Salamandra boss.
Salamandra
Foltest wants me to deal with the Salamandra - once and for all. I hope the king proves a trustworthy ally. I must dismantle Salamandra at the behest of the king himself.
The Experiment
Kalkstein claims the strange monster I slew was born of Salamandra's experiments. The stolen witchers' secrets are being used in a terrifying way... The soldiers contend the beast came from the swamp cemetery. The Salamandar hideout must be located there. The Salamandra hideout must be near the cemetery in the swamp.
Zoltan / Siegfried / Shani
A Hint
The king used Velerad to pass on a hint about Salamandra. I need to go to the Old Manor. Apparently, I'll find what I'm looking for there. I must go to the Old Manor, where I shall find what I'm looking for.
The Death of De Wett
De Wett was punished for his treachery. Nothing in the way now. I can go to the Old Manor. Let's see this secret Salamandra base... The way is clear, I can now go to the Old Manor, the secret Salamandra base.
Mutated Rayla
I came upon Rayla. She underwent a mutation that has clearly affected her mind. Unfortunately, I have to kill her. She has left me no choice. I have to kill Rayla, she has left me no choice.
Almost there
I came across Salamanders and some mutated hounds in the Old Manor. I must be nearing my goal. I must be getting close.
Entering the Catacombs
A Sacrifice
The Koshchey
I killed the koshchey, one of the most fearsome monsters I ever dealt with. I must press on and find Salamandra's leader. I must go on and find Salamandra's leader.
Azar Javed's Demise
I killed Azar Javed, the leader of Salamandra. The hydra has lost its head, the criminal organization has ceased to exist. I should search this chamber thoroughly, recover the stolen witchers' secrets. I must search this laboratory thoroughly. (3000 XP)
A Boat
I couldn't find the witchers' secrets, but that hardly brings my search to an end. I must warn the king of the Grand Master's intentions. He may have stolen the secrets.
The King
We are sailing to Vizima to warn the king and to bring the Grand Master to justice. We are sailing to Vizima. (6000 XP)
Videos
")